Switch Interfaces - Speed, Duplex, Status and Why Switches Don't Need "no shutdown"
A CCNA lab note on switch interface status, speed and duplex settings, auto-negotiation, and the key default-state difference between Cisco routers and switches.
These are my own notes from studying CCNA with Jeremy’s IT Lab. The concepts and explanations belong to him - I’m just writing down what I understand as I go, in my own words, and doing the lab myself in Packet Tracer.
After getting IPv4 addressing and basic router interfaces working, I moved on to switches - specifically, how to check and configure interface speed, duplex, and status. This lab also cleared up something that confused me earlier: why routers need no shutdown before a link comes up, but switches don’t.
The Topology
A single LAN on 192.168.1.0/24, with one router, two switches, and 4 PCs.
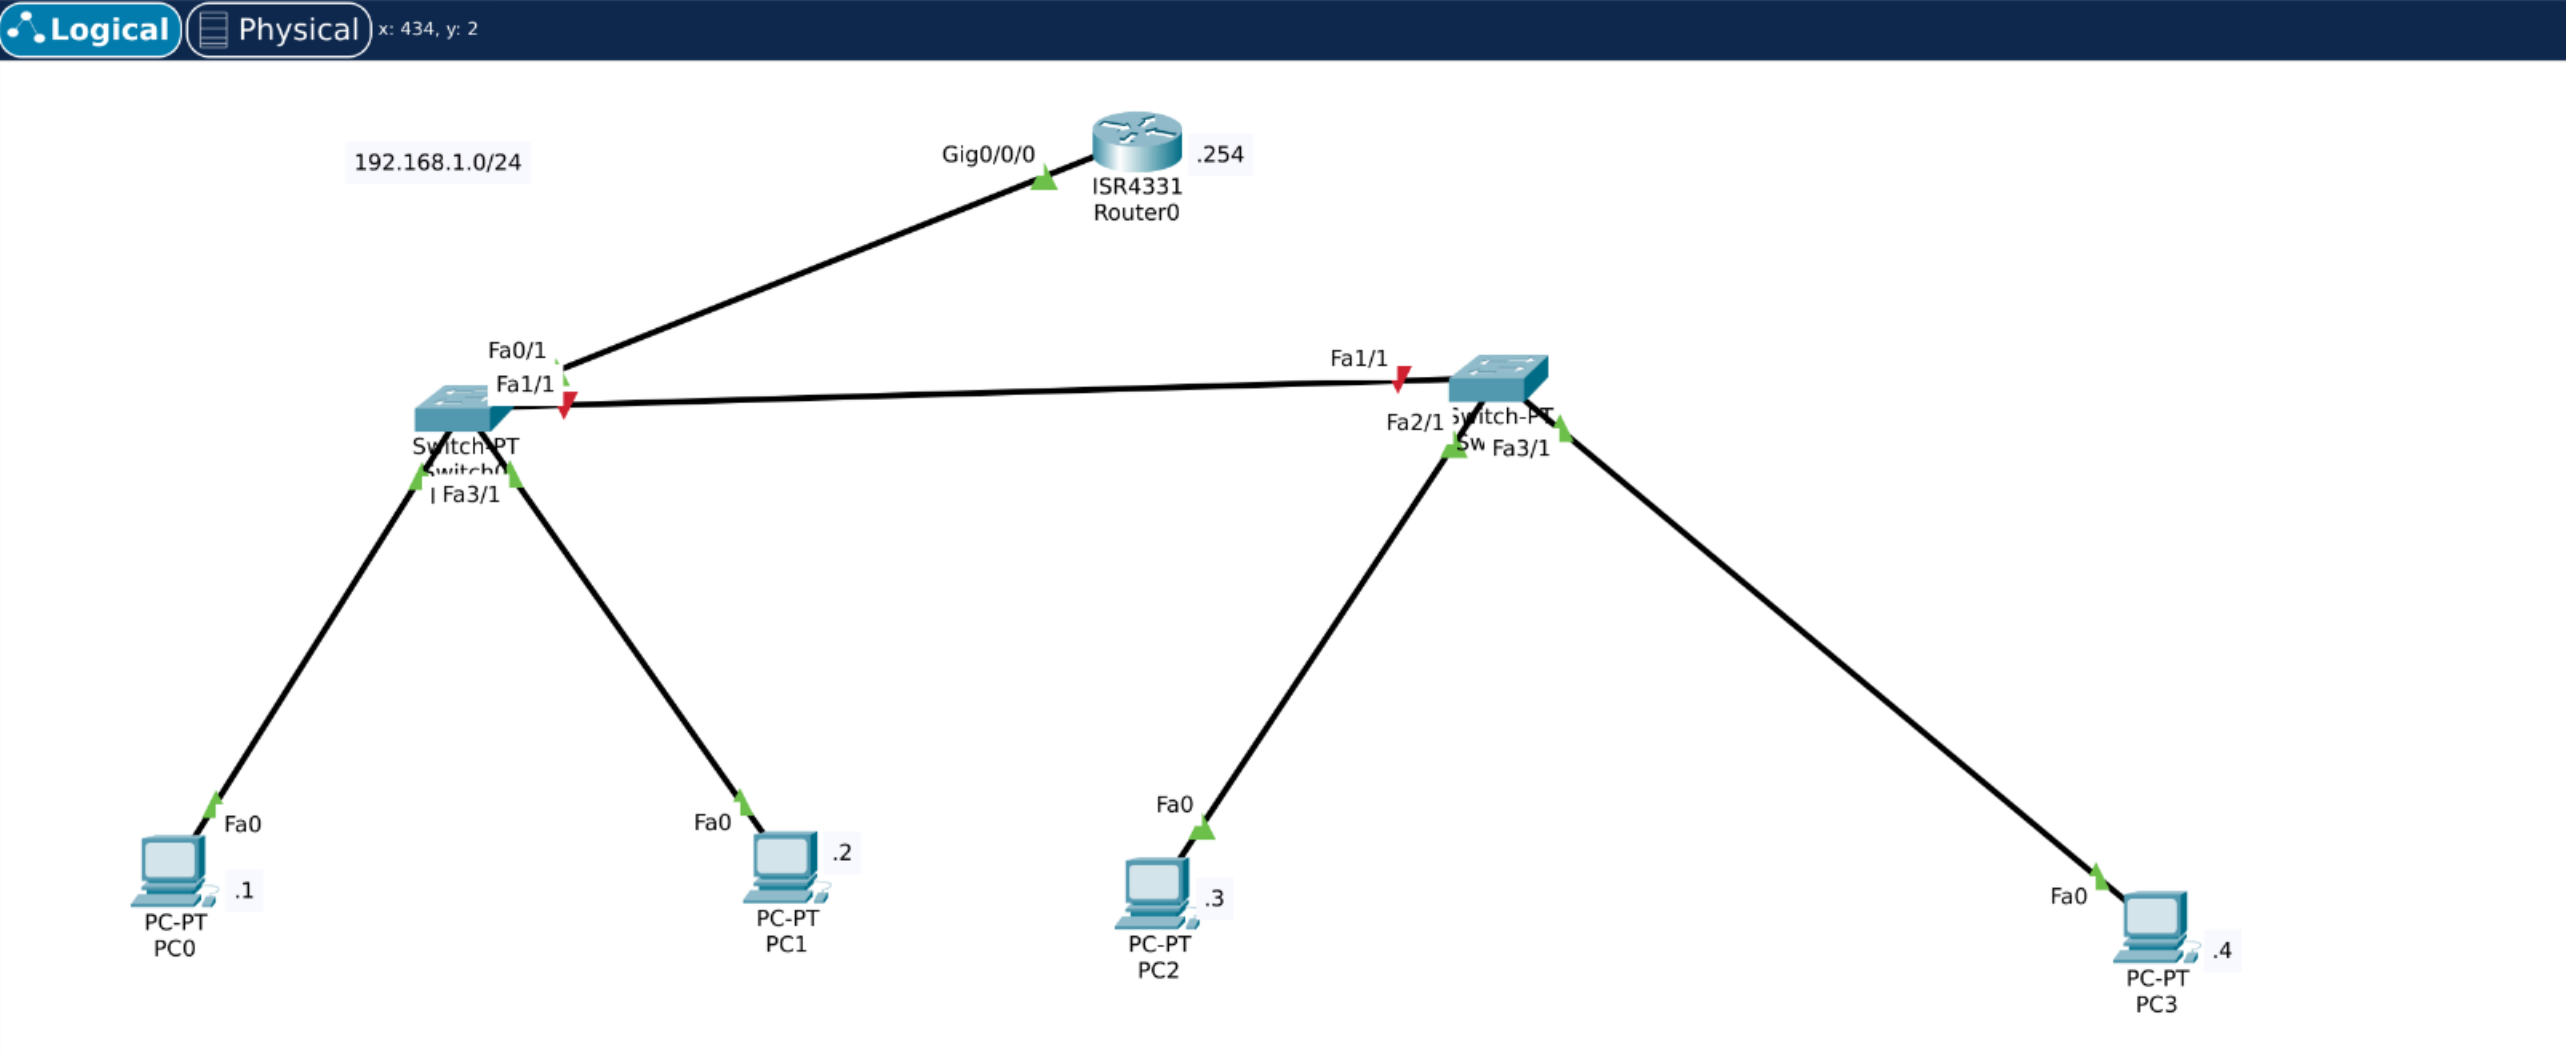 One router, two switches, four PCs - all on the same 192.168.1.0/24 network
Switch0 is the device I focused on, configuring its interfaces: Fa0/1, Fa1/1, Fa2/1, and Fa3/1.
Getting Into Switch0’s CLI
Same starting point as always - enable (or en) to move from User EXEC mode into Privileged EXEC mode, shown by the # prompt.
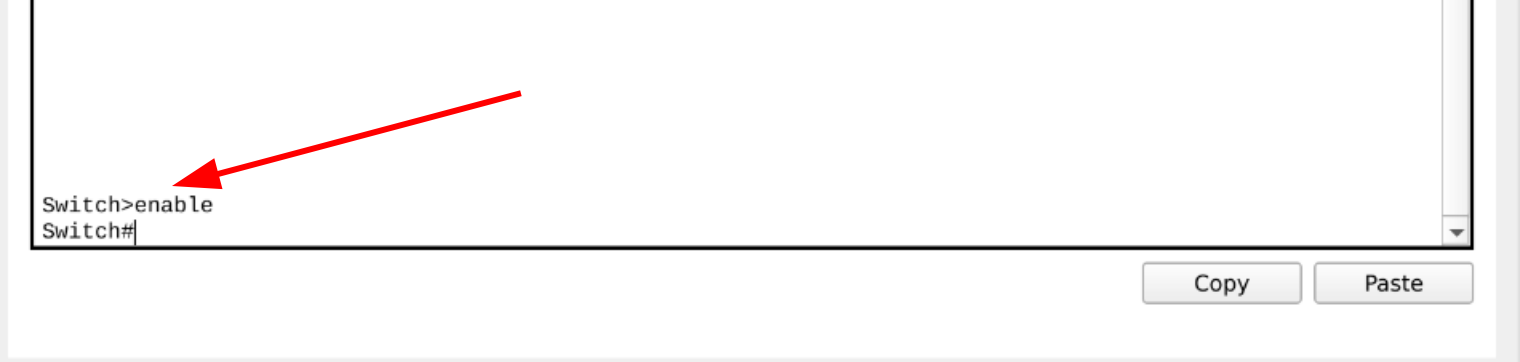
en takes you from Router> to Router#
Checking Interface Status
Running show ip interface brief shows the switch’s four interfaces, along with two important columns:
- Status → Layer-1 (physical layer)
- Protocol → Layer-2
If Layer-1 is up, Layer-2 might or might not be up too - it depends on what’s happening above it. But if Layer-1 is down, Layer-2 is automatically down as well, since Layer 2 can’t function without Layer 1 working first.
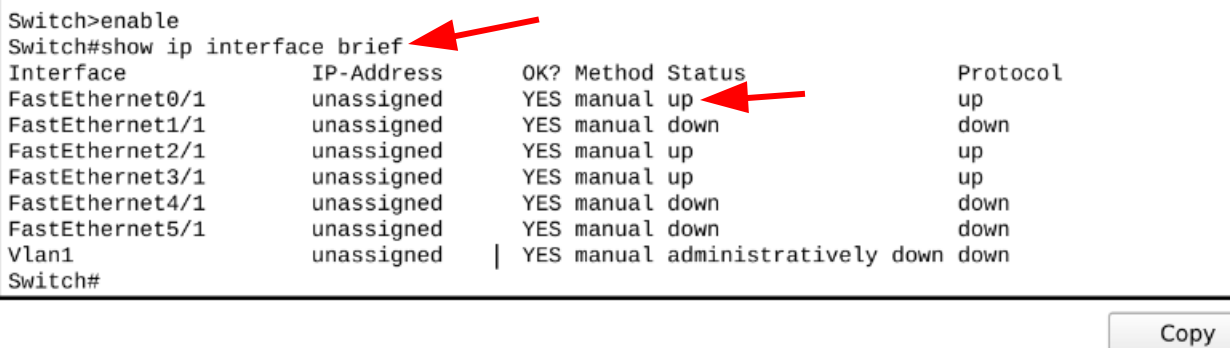 Interfaces already showing up/up, without any configuration
Here’s the part that confused me at first: I hadn’t configured anything yet, but the interfaces already showed up. That’s because routers and switches behave differently by default:
- A router interface has the
shutdowncommand applied out of the box - so it sits in administratively down state until you manually runno shutdown. - A switch interface does not have
shutdownapplied by default - it’ll simply be up/up if something is plugged in and working, or down/down if nothing is connected.
I also noticed the IP addresses on the switch show as unassigned - and that’s totally fine to leave as-is here, because switches operate at Layer 2 and don’t need an IP address to do their job (forwarding frames based on MAC addresses).
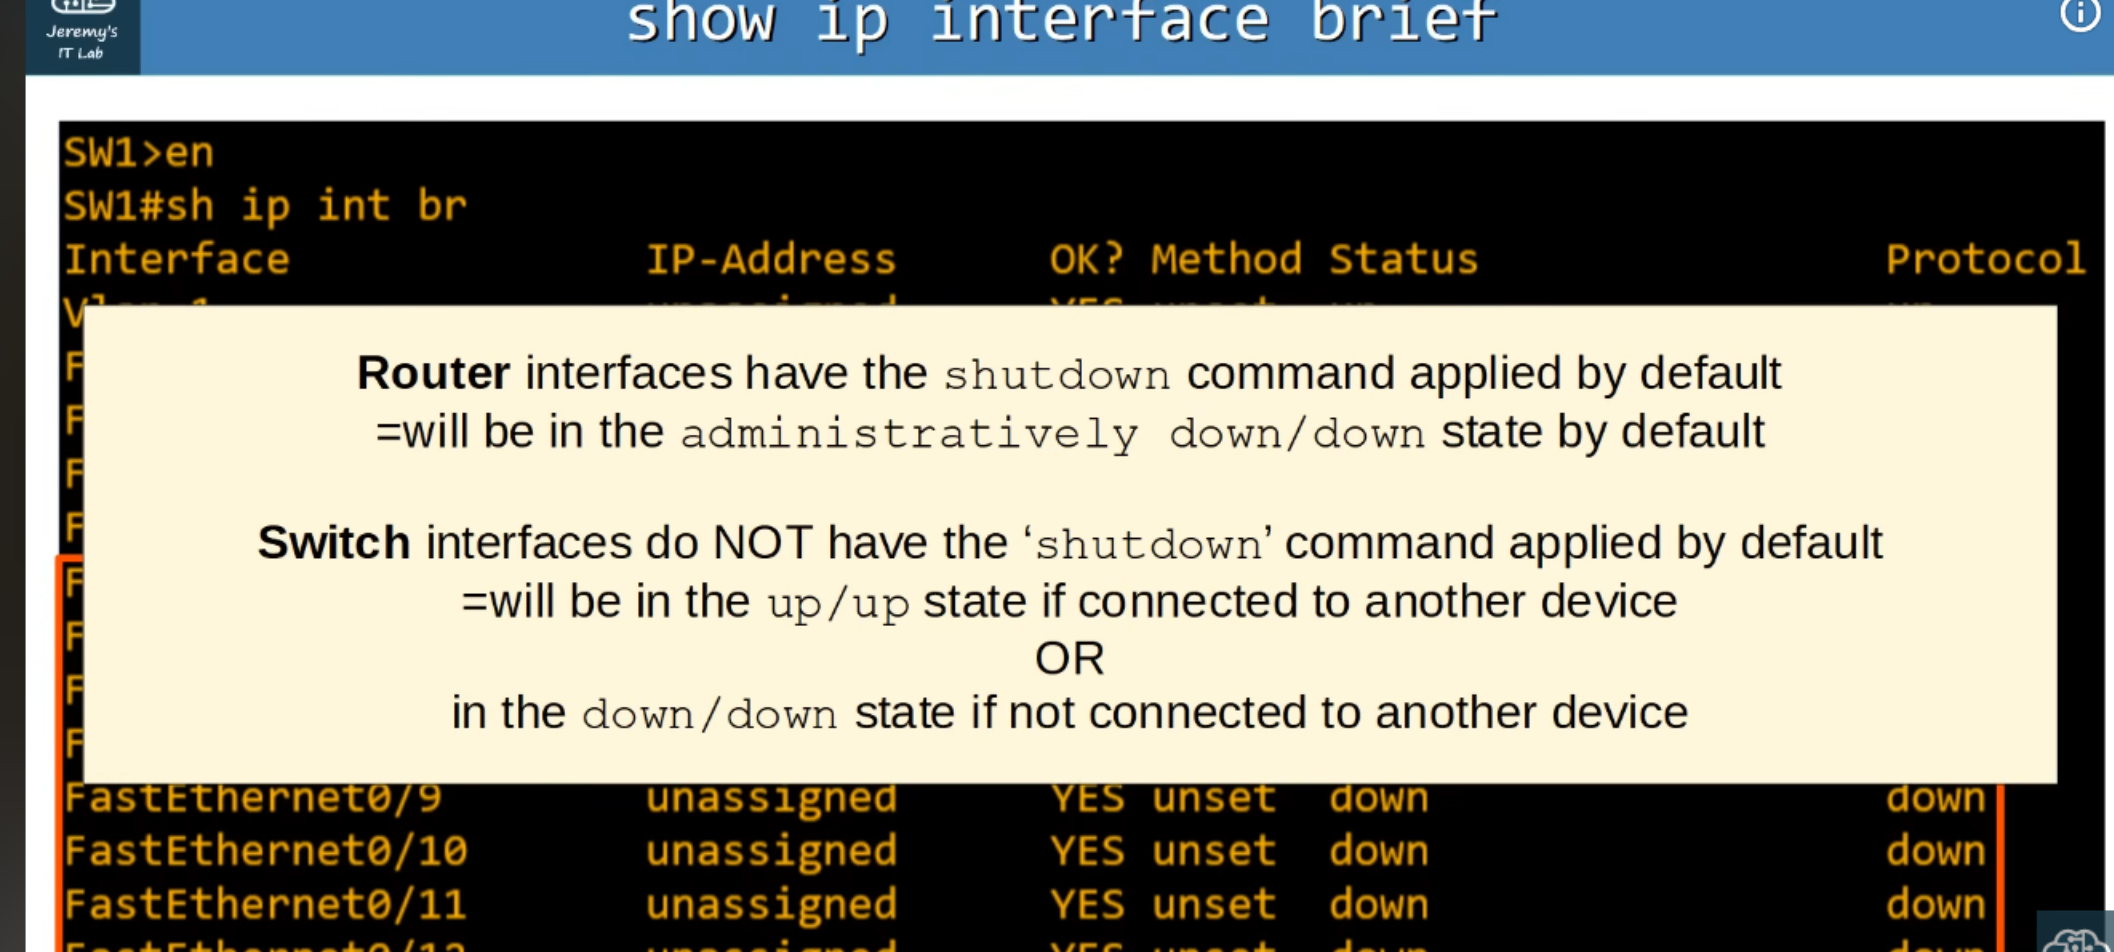 Router interfaces default to admin-down; switch interfaces default to up if connected
In multilayer switching, switches do need an IP address - but that’s a topic for a future lab.
A Closer Look: show interfaces status
This command gives a more detailed view, one line per port:
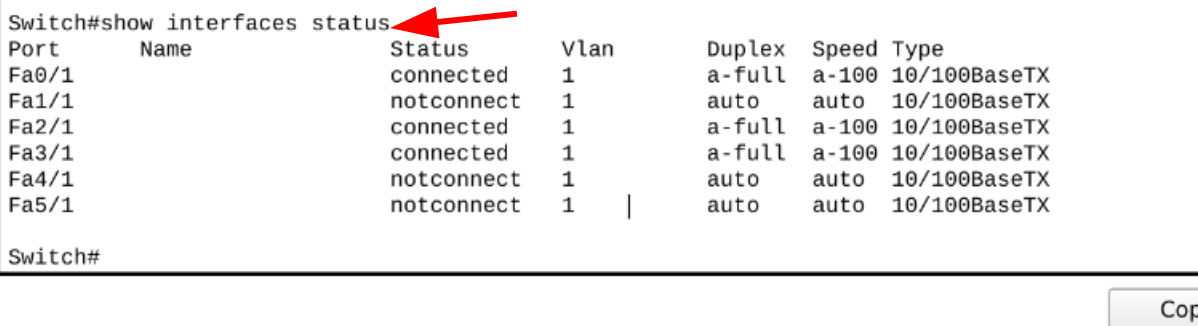 Port, description, connection status, VLAN, duplex, speed, and type - all in one table
- Port - the interface name
- Name - a description field (blank unless you’ve set one)
- Status -
connectedif a device is plugged in and talking to the switch,notconnectedif not - Vlan - which VLAN the port belongs to. VLANs split one physical LAN into smaller logical LANs. The default VLAN is 1. Sometimes this field shows
trunkinstead - more on that in a later post - Duplex - full, half, or auto. Half-duplex is basically extinct in modern networks; it’s almost always full or auto
- Speed - also auto by default. These are Fast Ethernet ports, capable of 100 Mbps, but they can also negotiate down to 10 Mbps
- Type - the physical connector type, here RJ45 for copper cabling (SFP modules would show differently)
What “auto” actually means: the two connected devices automatically negotiate and agree on the fastest speed and duplex setting that both sides support. In the output, a-full means “auto-negotiated, currently full duplex.”
Manually Setting Speed and Duplex
Normally you leave auto-negotiation on. But it’s worth knowing how to set things manually - useful for troubleshooting a mismatch, or just to understand what’s happening under the hood.
First, into the interface:
1
interface fa0/1
Then I checked the available speed options:
1
speed ?
Since this is a Fast Ethernet port, it supports 10, 100, or auto. I set it manually:
1
speed 100
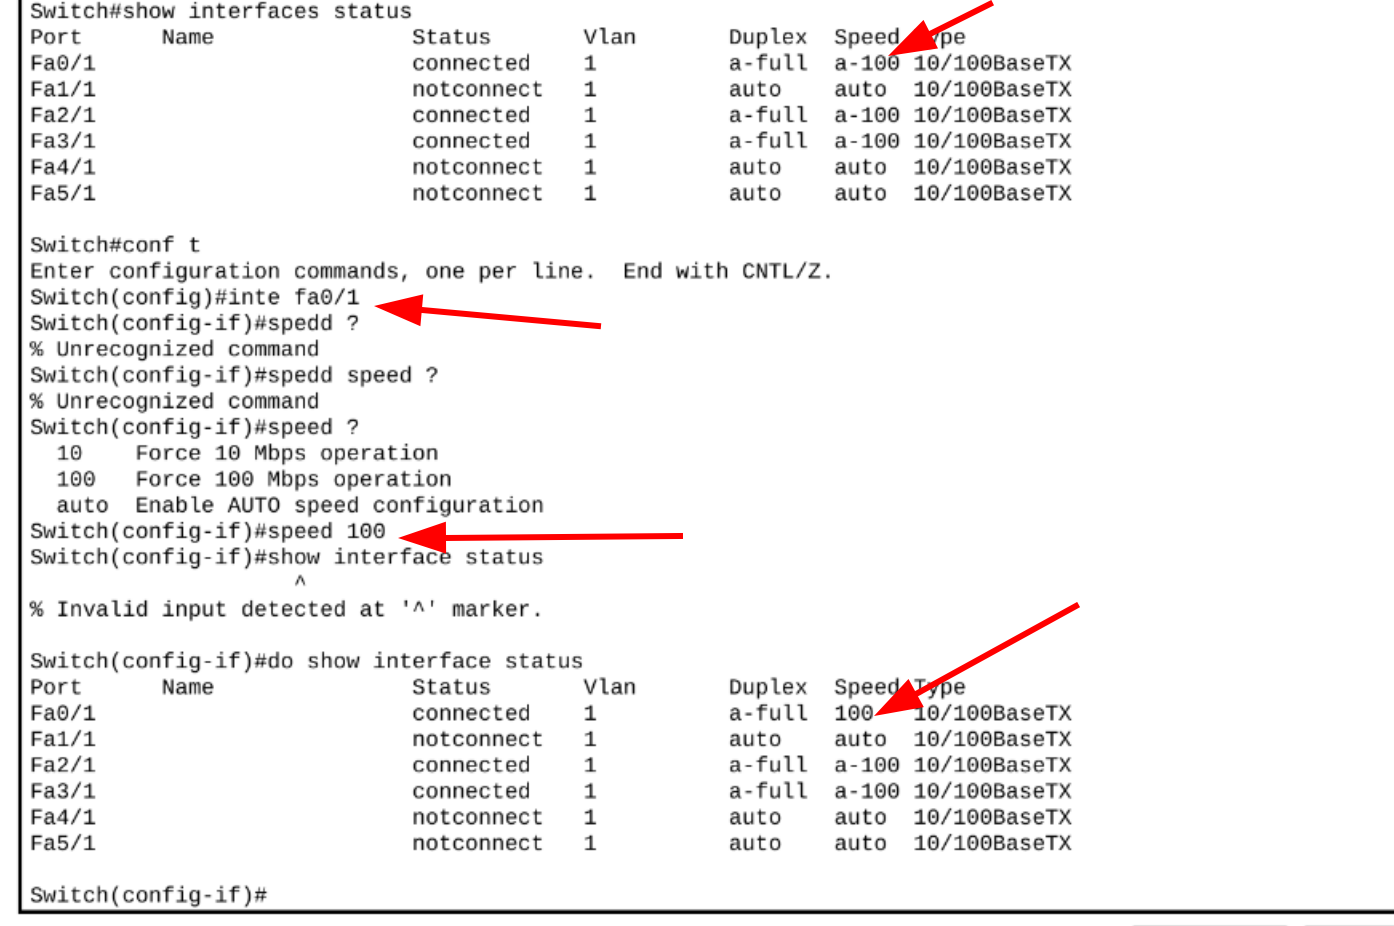 Comparing before (a-100, auto) and after (100, manually set) - and yes, I made a typo along the way, visible in the screenshot too
Comparing before and after made the change obvious: it went from a-100 (auto-negotiated to 100) to just 100 (manually fixed, no longer auto).
Next, I set duplex to full and added a short description to the port:
1
2
duplex full
description ## to R1 ##
To confirm without leaving interface configuration mode, I used:
1
do show interface status
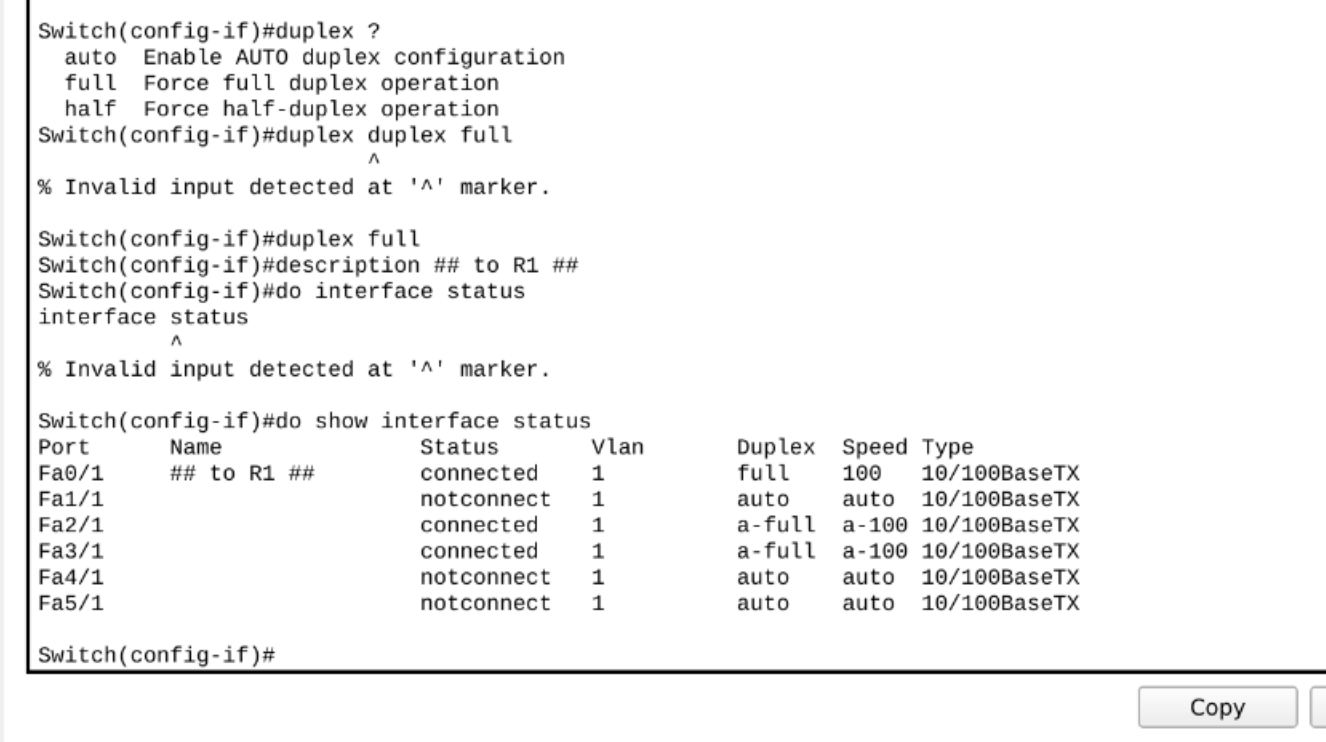 do lets you run privileged EXEC commands from inside interface config mode
Configuring Multiple Interfaces at Once
If several interfaces need the same configuration, you don’t have to repeat it one by one - interface range lets you select a group:
1
interface range f0/5-12
This drops you into configuration mode for interfaces 5 through 12 together (adjust the range to whatever ports you actually need).
What I Took Away From This
The biggest thing that clicked for me here is the default-state difference between routers and switches - it explains why my router lab needed no shutdown everywhere, but this switch lab didn’t need it at all. Beyond that, understanding show interfaces status and how auto-negotiation actually works (both sides picking the best shared speed/duplex) makes troubleshooting a “why is this link slow” problem way less mysterious.
Next up: VLANs, since show interfaces status kept pointing at that “Vlan 1” default the whole time.